
Key Highlights
- Slat wall panels are a stylish and practical way to elevate interior spaces, offering endless customization with wood slats and accessories.
- Proper installation requires essential tools, including a circular saw, drill, and level, for smooth, professional results.
- Wall preparation, accurate cutting, and secure mounting are vital for both aesthetics and function, especially for heavy-duty storage in garages.
- Accessories like shelves and hooks expand your wall’s versatility, making organization effortless.
- At Panneli, customizable wall panels transform blank walls into expressive design features, tailored to your taste and needs.
Introduction
Looking to add something fresh to your walls? Installing slat wall panels is a good way to make plain walls stand out. The wood slats on these wall panels look nice and work well in any room, garage, or shop. In this step-by-step guide, you will learn how to put up slat wall panels. This guide will show the main steps to follow and what tools you need. When you use slat wall panels, you can change how your room looks and feels. The wood slats help give your space a new touch of style.
Why Choose Slat Wall Panels for Your Space
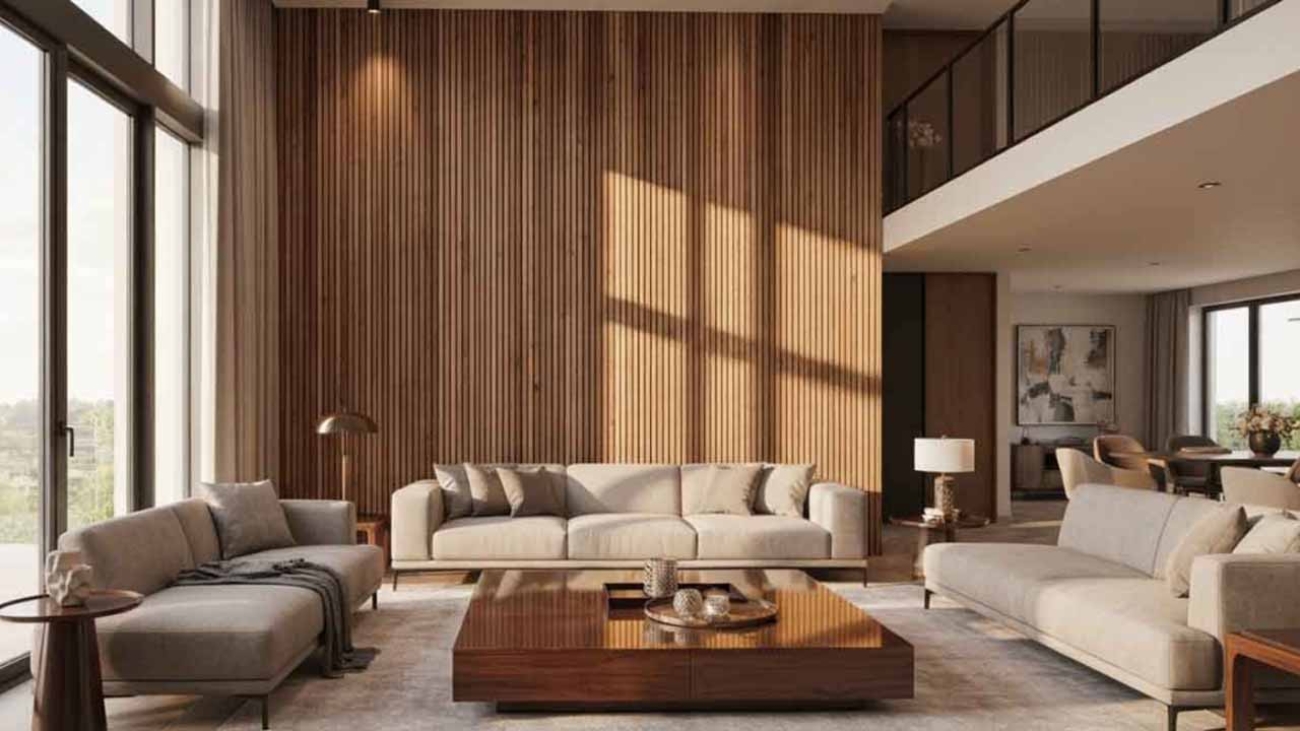
Have you ever thought about why slat wall panels are so popular for the inside of your home? These wall panels are not just about style. They bring a mix of modern look, easy way to keep things neat, and they fit in almost any room. Slat wall panels use wood slats, which be a classy touch and really change the look of your living room, office, or even a place where people shop. You can use them to show off your favorite artwork or accessories. This gives you the chance to change your space whenever you want.
What are the real benefits? First, slat wall panels help make a room less noisy. This is great if you have a busy house. You also don’t have to do much to keep them clean—just wipe them, and they stay looking new. “Slat wall panels create chances for people to show who they are, change things up, and make every place feel special,” say the team at Panneli. They are so useful that you can use them as just a small feature, a way to hold accessories, or even cover a whole wall. Why have plain walls when you can make them the heart of your home’s style?
Choosing the Right Slat Panels for Your Design Vision
When you want to pick the best slat wall panels, first think about what you need most. Do you like the look and feel of wood slats, or do you prefer the strong and clean style that PVC gives? MDF panels are good when you want to save money. They also have a smooth surface. PVC is a great choice for places like bathrooms or garages because it can stand up to water. Where you put your wall panels and what kind of accessories or shelving you want to use will also help you decide.
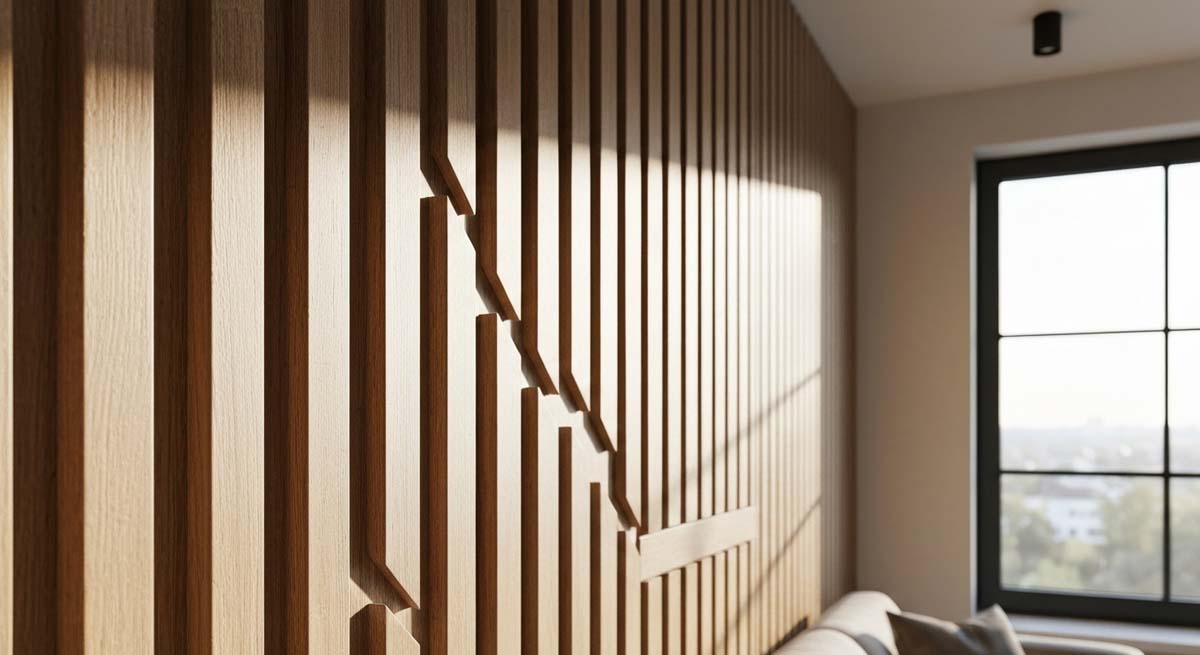
There are so many ways to design wall panels. You can pick finishes that go from simple lines up and down, to more interesting shapes. Slat wall panels come in many textures and looks. Panneli lets you pick and change your own design. This makes it easy to find wall panels that match your style and fit in with what you already have at home.
|
Panel Type |
Best For |
Style Options |
Durability |
Accessories Compatible |
|
MDF |
Living rooms, bedrooms |
Painted, woodgrain |
Medium |
Yes |
|
PVC |
Garages, bathrooms |
Smooth, textured |
High |
Yes |
|
Wood Veneer |
Feature walls, offices |
Natural, stained |
High |
Yes |
Are you ready to pick your wall panels now? Just go with what looks good to you and also think about
Step-by-Step Guide to Installing Slat Wall Panels for Stunning Interiors
Putting up slat wall panels is easier than you may think, even if you do not have much experience with DIY projects. You just need to plan things out, measure with care, and use a few basic tools, and you can do this. First, get all your materials ready. Then, make the wall surface smooth and look for the wall studs. Once that is done, you will be ready to cut and put up the wall panels. This way, you will get a strong hold and a neat finish. No matter if you want to give your living room a new look or just need extra strength for storage in the garage, using this simple guide will help you get great results that last.
1. Gather Essential Tools and Materials for Slat Wall Panel Installation
Before you begin, be sure you have all the tools and materials you need. Getting your items ahead of time helps you save time. It also makes the job easier and helps it go smoothly. You will use these:
- Circular saw so you can cut the panels neatly and well
- Drill and black screws to hold things in place and mount panels safely
- Spirit level and tape measure for getting the placement right
- Stud finder to spot wall support areas
- Utility knife and jigsaw when you need to do careful, smaller cuts
First, set up your area where you will work. Check all your wall panels, wood slats, and each accessory you plan to use. Make sure the blade on your circular saw is sharp. The blade should fit the type of panel you will be cutting. Remember to use safety gear, like goggles and a dust mask, for your job. If you will put up shelves or other accessories, get your hooks and brackets now. When you start with the right setup, you give yourself a good chance for a clear slat wall panel job. The right tools and plan help you get nice results with your wall panels, wood slats, circular saw, and accessories.
2. Prepare Your Wall Surface and Locate Studs
Start by clearing out the space and make sure the wall is both clean and dry. You need to get rid of any dust, grease, or bumps. These things can stop your wall panels from sticking well or sitting flat. Take your time patching any holes or sanding rough spots. These simple steps help your wood slats fit closely for a smooth, neat look.
Next, you will need to find the wall studs. This step is important, especially when you want to hang heavy items or shelves on your slat wall panels. Use a stud finder and mark the spot of each stud up and down the wall. Marking these places lets you put screws into something strong, making sure your setup will hold up.
Don’t skip this job. If you put mounting screws straight into drywall, it will not hold up wood slats and accessories well enough. Once the wall is ready, and you have marked the studs, you can move on to measuring and cutting the panels so they fit just right.
3. Cut Slat Wall Panels for Perfect Fit Around Outlets and Corners
Measuring and cutting are the most important steps to get right. Start by putting your wall size measurements on the back of each of the slat wall panels. Make clear marks where any outlets, corners, or other things are on the wall. For long, straight cuts, use a circular saw with the wood slats. For smaller areas, like places around outlets or switch plates, use a jigsaw or a utility knife.
- Double-check all your measurements before cutting.
- Use painter’s tape on the slat wall panels to help get cleaner edges.
- Cut slowly so you do not splinter the wood slats.
- Do a test fit with the wall panels before you install them for good.
If you get a tricky spot, like a corner or a baseboard, carefully mark and cut the wall panel to make sure it sits flat and even against the wall. Paying attention to these things will help your slat wall panels look good and well done. There will not be visible gaps or edges that look out of place.
4. Mount and Secure Slat Wall Panels for Maximum Strength
Now it’s time to put up the slat wall panels. You can start at one end of the wall or in the center, as you want. Line up the first panel with your plumb line. Hold it in place, then put screws into the marked studs through the felt or backing. Space the screws so they are not too far or too close together, both top and bottom.
If you plan to store heavy things, like in garages, make sure every screw goes into a stud and don’t make them too tight. According to Casey Finn, who is an interior design expert, attaching slat wall panels right to the studs makes them stronger and safer for heavy items. After you finish with each panel, check if it’s level before you start the next one.
If you install accessories or shelves later, always use the right slat channels. These channels are made to hold weight and keep things secure. Keep going with each wall panel, always making sure the lines match, for a wall that is strong, good looking, and neat.
Materials, Tools & Prep You’ll Need
To set up slat wall panels in your home, you need a few things and a space that is ready to work in. Get your circular saw, drill, tape measure, stud finder, spirit level, utility knife, and sandpaper. Be sure to have all the wall panels, wood slats, and accessories you will use. You also need screws or glue, based on how you plan to put up the panels.
Before you start, it’s best to leave the panels in the room for about 24 hours. This will keep them from changing shape later. Make sure to clear out the area on the wall where you will work. Lay out your tools so you can get to them easily while you work. If you want to put up shelves or heavy things, get the brackets and anchors now. Good planning not only saves you time, but it will also help your slat wall panels go on smoothly and do their job well.
Securing Additional Panels: Alignment & Spacing Tips
When you add more slat wall panels, it’s important to get the alignment and spacing right. Start by putting each panel in place without attaching it. Check every line with a level. Look at both the vertical and horizontal lines. This helps the wall look neat and smooth. Push the panels close together. Leave a small, 1/16″ space if the maker says to. This helps stop the panels from bending when it gets hot or wet.
If you want to add more accessories like shelves or hooks, check that the slat channels match up on all your wall panels. The right spacing helps you move these accessories with no trouble and keeps the shelves looking even. If your wall panels need to go into a tight corner, measure two times before you cut once. That way, you get a clean edge every time.
Spend extra time on these steps. The way you line up everything really shows when you finish. After all the panels are set up, step back and see how good the space looks with its new, seamless wall panels and accessories.
When to Call in the Professionals
Many people can put up slat wall panels by themselves. Still, there are times when getting help from a pro is the best idea. If your room has sharp angles, lots of outlets, or you want to cover a whole wall from top to bottom, a skilled installer will make sure that every piece fits well. Big projects in stores or hotels—where things have to be strong and safe—also need wall panels set up by an expert.
You should feel free to call someone if you are putting panels on a spot that needs more support, or if you want to hide screws and get a smooth look. A company like Panneli will share ideas, handle the wall panels installation, and match the finished look to what you want. Paying for expert help can be the best way to make sure your slat wall panels really make part of your home or office stand out.
Conclusion
To sum up, putting up slat wall panels can really change the look of your home or office. You get both a fresh style and a lot of use from them. If you follow the steps we give in our guide, you can make your place look smooth and put together. It helps to know how to put in wall panels, whether you do it yourself or hire someone. Make sure you gather all the right tools and materials before you start. Take time to get your walls ready and be careful with how you line things up. This will help you get the best results. If you want more tips, or you want to see other ideas, you can go to Panneli for choices that will help show off your personal style. Don’t wait—get started with your wall panels project today!
Frequently Asked Questions
What are the most common mistakes to avoid when installing slat wall panels?
The mistakes people make often include not finding the studs before putting up wall panels. Many also cut wood slats with a circular saw the wrong way, which can make the wood split. Skipping prep for the surface and not lining up the panels right are other problems. Careful planning and measuring help you avoid these issues. With these simple steps, you can have a smooth wall panel install.
Can I install slat wall panels over existing wood paneling or do I need to remove it first?
Yes, you can put slat wall panels over the wood slats or other wall panels you have if the surface is flat and does not move. The base should be solid and steady. If there are bumps or lines, you may need to sand them down or add a layer underneath. Cutting for outlets and accessories works the same way it does when you put slat wall panels over drywall.
Are there differences in installing MDF versus PVC slat wall panels?
The main difference between these wall panels is in the tools you use and how you handle them. MDF slat wall panels are easy to cut clean with a circular saw. These be good for dry places. PVC panels need special blades if you want smooth cuts. They work well in damp areas. You will follow the same mounting steps for both, but they are different in how much they weigh and how flexible they are.
Add a Comment