How Do You Install Wall Paneling for a Stunning Look?

How Do You Install Wall Paneling for a Stunning Look?

Key Highlights

  • Begin your project by choosing the right wall paneling for your room’s style and function.
  • Always prepare your walls by cleaning, smoothing, and repairing any imperfections for a secure fit.
  • Acclimatize your wood wall paneling to the room’s humidity for at least 48 hours before installation.
  • Measure your walls carefully and create a level starting line to ensure your wall panels are perfectly aligned.
  • Use a combination of construction adhesive and finishing nails for the most durable panel installation.
  • Follow a systematic process for cutting and fitting panels to achieve the best results.

Introduction

Adding wall paneling to your room is a good idea if you want more style and warmth in your place. It can make the space feel richer and more welcoming. Many think panel installation needs a pro, but you can do this project on your own. It can change how your home’s inside looks with just a bit of work. If you wonder how to install wall paneling, this guide is here to help you out. It will show every step, from how to choose the right paneling to making sure the finish looks smooth. Doing it yourself can be simple, and you will get good results for your home.

Choosing the Right Wall Paneling for Your Space

The first thing you need to do for any installation is pick the best wall paneling for your room. The wall panels you choose will change how the space looks and will also decide how you install them. The choices range from wood wall paneling, which adds a classic touch, to modern panels made for better sound. There is a lot to choose from.

You need to think about the style you want. Do you want a modern look, or do you like a more warm and homey feel? The material, color, and texture of the paneling should match your decor, so everything looks good together and gives a perfect finish. Keep in mind that different panels, like wood wall paneling or decorative panels, may need a different way to work with them or install them.

Types of Wall Paneling: Decorative, Wood, and More

Looking at the different types of wall panels can help you choose the right wall paneling for your home. You should think about what style you like and what you need the panels to do. Every type of paneling looks different, and the way you put it up may change. This makes it important to know how you install wall paneling in the best way.

The main kinds of paneling you can pick from are:

  • Wood Wall Paneling: These panels look classic and fit in most places. They add warmth and natural feel to a room. Most come in many kinds of wood, like oak or walnut. There are different finishes to match your style.
  • Acoustic Slat Panels: These panels do more than look good. They help with sound, so the noise does not bounce around. People use them in media rooms or big living areas.
  • Decorative Panels: This type covers lots of styles. You can get panels with shiny metal finishes, cloth looks, or custom shapes. You can get creative with these and make one wall stand out.

The way you install the wall panels depends on which type you select. Light decorative panels can stick on with glue. But heavy wood wall paneling needs to be held up with strong tools.

Factors to Consider: Style, Durability, and Function

Beyond the material, there are the other things to think about for getting the best results with your wall paneling project. It is a good idea to think about these things before you start, so your new walls look nice and work well for a long time.

When you pick your panels, keep these things in mind:

  • Style: Make sure the panel design fits your home’s style and inside look. You would not want a modern panel in a farmhouse because the look could be out of place.
  • Durability: For spots most people walk through like halls or work areas, pick panels that take bumps well and are easy to clean.
  • Function: Do you need more than just something nice to see? Look for panels that help with sound or keeping the warmth in. These panels can make your area more cozy.

How you put the panels up will depend on which ones you choose. Heavy panels that last long often need glue and nails to stay up tight. Lighter ones might only need construction glue.

Essential Tools and Materials for Installing Wall Paneling

Wall Panel - Essential Tools and Materials for Installing Wall Paneling

Having the right tools and materials ready helps you to get a good, smooth look when you put up wall paneling. Before you start, it’s a good idea to get all your things together. This stops you from having to stop and look for something in the middle of the job. If you want to know how do you install wall paneling the right way, you should start with a toolkit that is ready to go.

You will need some basic tools to measure and cut, like a tape measure and a saw with fine teeth. For putting the paneling up, you will also need a caulk gun to use with the glue or caulk. The glue you use and what you use to fasten the paneling will depend on the type of wall paneling you pick and what kind of wall you are putting it on. Let’s take a closer look at what you should have for this job.

Tool Checklist for a Smooth Installation

Getting your paneling job done well comes down to having the right tools and making sure you are careful at every step. A complete checklist helps you get ready for everything, from measuring to putting on the final touches. You don’t need to have a workshop with every tool out there. The key is to have some must-have items, and you can’t skip these.

Here is a basic tool checklist for your project:

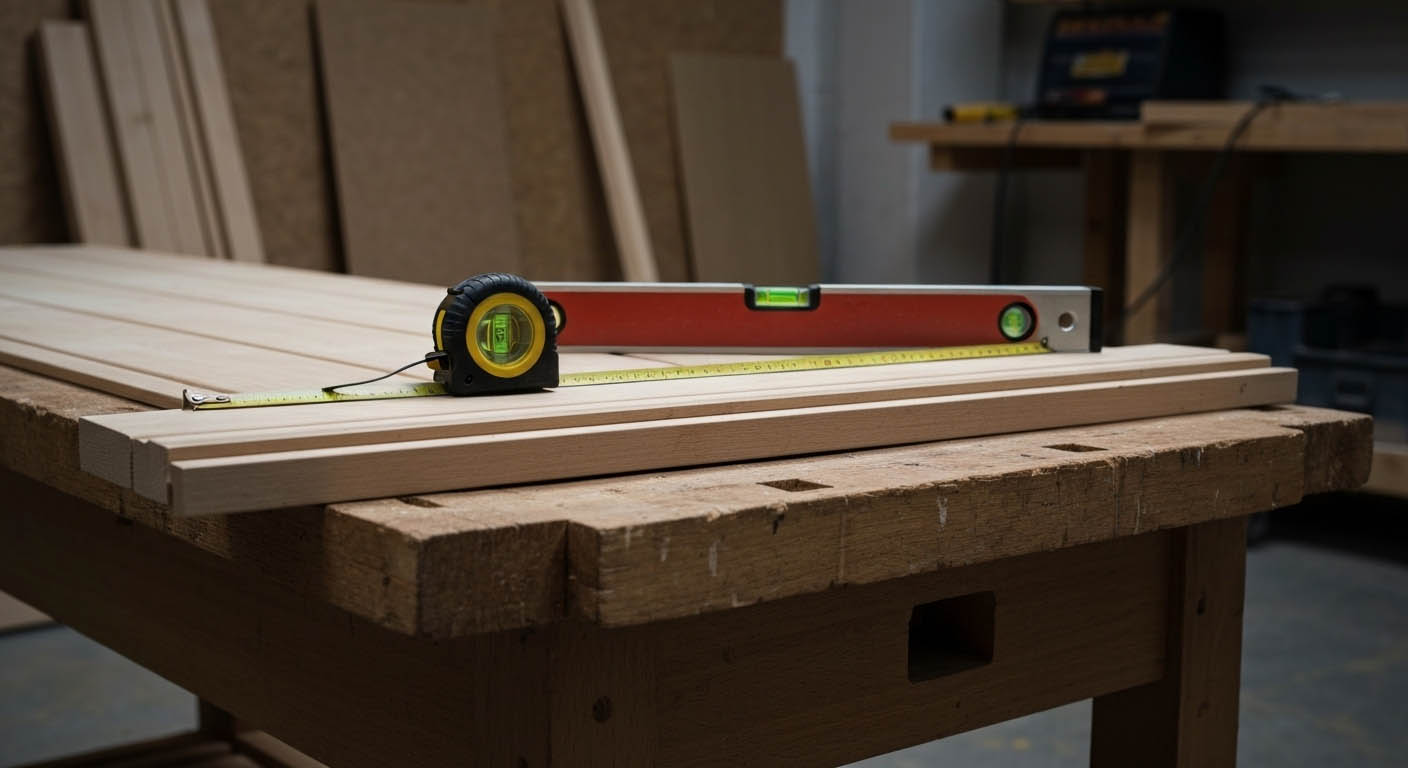
  • Tape Measure: You will use this to measure your walls and the panels. That is how you get things the right size.
  • Level: You need this for getting your first panel straight up and down. That way, the rest will follow and look good.
  • Fine-Toothed Saw: Pick a handsaw, circular saw, or saber saw that uses a fine blade. This helps you cut neatly and keeps the panel from breaking apart.
  • Caulk Gun: You will use this to put construction caulk on nice and even.
  • Rubber Mallet: Use this to lightly hit the panels into place, but still protect the surface and keep it smooth.

Having these gives you what you need for starting the job. You will also want a pencil for marking things, and a stud finder can help you know where to put the nails so the paneling sits snug.

Recommended Materials for Long-Lasting Results

Alongside your tools, the quality of your materials will determine the longevity and finish of your wood wall paneling. From the adhesive that holds the panels to the caulk that finishes the seams, choosing high-quality products is key. Whether you’re applying panels over drywall or another surface, the right materials ensure a secure bond.

The primary materials you will need are the panels themselves, an appropriate adhesive, and fasteners. Construction glue is a popular choice for its strong grab, but you may also need finishing nails for added support, especially with heavier panels.

For a professional look, you’ll also want materials to complete the job.

Material

Purpose

Construction Adhesive

The primary method for securing panels to the wall.

Finishing Nails

Used for additional support, especially when nailing into studs.

Wood Putty

Fills nail holes for a seamless, unblemished appearance.

Caulk

Seals gaps along edges and between panels for a clean finish.

Prepping Your Walls for Paneling: Drywall, Studs & Beyond

Getting the wall ready is a key step and you should not skip it. You need the wall to be clean and smooth. The surface should not be loose. This helps the adhesive on the back of the panel to hold well. The wall paneling will stay up for a long time if you prep the surface in this way. It does not matter if you will put the paneling over drywall or right onto studs. It is important to use some time to get the wall ready.

There is this other step you need to look at. You must get the wall paneling itself ready. This is very important for wood panels. Set them in the room for around two days, so they get used to the humidity and temperature. This way, you stop the wood panels from getting bigger or smaller after you put them on the wall. Skipping this could make gaps or cause the panels to bend.

Cleaning and Smoothing Surfaces Prior to Installation

You can put wall paneling right over drywall, but you must get the wall ready first. To get a great look with paneling, start with a nice, clean surface. If there are any rough spots or holes on your wall, they can show through and make the paneling look bad. So, be sure to clean and smooth the surface before you begin. This helps the paneling stay in place on the wall.

Follow these steps to get your wall ready:

  • Remove Obstacles: Take off things like outlet covers and switch plates. Remove any nails or screws too. If you want to use old baseboards or trim again, carefully take them off.
  • Clean the Surface: Wipe down the wall. Clean off any dust or grease. The back of the panel will stick better to the wall if it is clean and there is no dust.
  • Repair Damage: Fix any holes or cracks using caulk or spackle. Let it dry, then sand the spots so they are even with the rest of the wall.
  • Sand Away Imperfections: Lightly sand any rough spots or uneven places on the drywall so you get a flat wall.

Getting the drywall ready in this way helps make sure your wall paneling will be flat and stick well. These steps work if you are putting paneling on drywall or on studs.

Tips for Installing Over Drywall Versus Studs

The way you install wall paneling can be different if your wall has drywall or just bare studs. Many times, people put the paneling right over drywall when doing a remodel. After you clean and get the wall ready, you can put glue on the drywall. Then, press your panels in place.

If the wall has no finish or you want more insulation, you may want to put the paneling over studs. You can nail the sheets to the studs for this. There are times, like when using acoustic panels, you might need to put wood strips across the studs first. These strips let you screw in the panels and can help with sound as they leave an air gap.

This way lets you get a strong and secure fit, but it takes a bit more work to set up, compared to just using glue on drywall. Make sure to use a stud finder before you nail or screw anything so you hit the solid wood and get the best hold.

Step-by-Step Guide: How Do You Install Wall Paneling Like a Pro

Step-by-Step Guide: How Do You Install Wall Paneling Like a Pro

Now that your walls are ready and you have all the things you need, you can start the panel installation. The best way to get a perfect finish is to follow each step carefully. If you wonder “how do you install wall paneling,” don’t worry. When you break it into simple steps, it is much easier to do.

In this part, you will see how to measure, cut, and attach your wall paneling. Take your time and focus on the details. This will help you change your room and feel good about your work. You can get most of the supplies for paneling from stores like Home Depot.

Measuring, Marking, and Planning Your Layout

Accurate measurement is key when you want your wall panels to look good after installation. If you rush this step, you can waste materials and end up with panels that do not look straight. Start by using a tape measure to find the height and width of your walls. With this, you can calculate the square footage. This number will help you figure out how many wall panels you should get.

It is a good idea to follow these steps when planning:

  • Calculate Your Needs: Once you know the square footage, take the length of the wall and divide it by the width of your panel sheets. This tells you how many you need. Add about 10% more for mistakes or extra cuts.
  • Find Your Starting Point: Walls are often not perfectly straight. To make sure your panels are straight, begin in a corner. Use a level to make a line up and down on the wall as a guide.
  • Plan the Layout: Before you put on any glue, lay out the panels in the room and number them. This step helps you line up patterns or wood grain so it looks neat.
  • Mark Cutouts: Find all places where there are outlets or switches. You will need to mark and cut holes in the panels for them.

Taking time for planning makes the work easier. You will have panels that look straight, line up nicely, and fit well.

Cutting Panels, Leveling, and Securing for an Even Appearance

Once your layout is ready, you can start to cut and fit the panels. You need to use a saw with a fine-toothed blade. This stops the panels from splitting or getting rough edges. It helps you get a smooth finish each time.

For best results, you should do this:

  • Cut Panels to Size: Trim every panel so it fits the height of your wall. Leave a small 1/4-inch gap at the top and bottom for it to move. If you have outlets, use a piece of paper as a template. Trace it on the panel to get the shape right.
  • Apply Adhesive: Get a caulk gun and put construction glue on the back of the panel in a zig-zag or wave line. This covers the back well and makes the glue hold strong.
  • Secure the First Panel: Line up the first panel with the level line you made before. Hold the panel firm against the wall. Use a rubber mallet to gently tap it in. The first panel is important. It helps make sure all the others be straight.

After you put the first panel in and it’s straight, do it again for the other panels. Place each one tight to the one before so you get a smooth look on your wall.

Common Mistakes to Avoid When Installing Wall Paneling

Even when you plan carefully, mistakes can happen in a DIY job. It’s good to know some common problems that people have when they try wall paneling. This can help you avoid those issues and get the best results. Just a few small mistakes, like not getting the wall ready or picking the wrong glue, can change how your paneling looks when you finish.

For example, one big mistake is not letting the panels get used to the room’s humidity before putting them up. This could make the panels bend or look bad later on. Some people also use too little glue or skip nails. You really need nails to hold up heavy panels. Now, let’s talk about these problems. This will help you do your wall paneling the right way the first time.

Adhesive vs Nails: Which Method Works Best?

A lot of people ask about how they should install wall paneling. Should you use glue, nails, or both? The answer can change based on the kind of wall paneling you have and what your wall is made of. There are good reasons for each method.

  • Adhesive (Glue): You can use strong glue for light and decorative panels. It leaves the wall looking clean with no nails. It is easy and fast to do this way.
  • Nails: If your panels are heavy or made of wood, or you are putting them over studs, go with nails. You need a stud finder to locate the studs. Drive your nails through the wall paneling so they go into the wood behind.
  • Adhesive and Nails: Some people use both glue and nails for wall paneling. Glue gives better contact with the surface and keeps the panel from rattling or moving. Nails help hold the panel tightly, right away, as glue dries.

For most installs, especially with real wood paneling, you should use both glue and nails over studs. It makes sure the wall paneling will be steady, strong, and stay put for a long time. You do not have to worry about it shifting or moving away from the wall.

Conclusion

Installing wall paneling can really change how a room looks. The right paneling gives your space a fresh and nice feel. You need to know how to pick good materials and make sure the walls are ready. This helps everything look neat and gives it a pro touch. If you follow the steps one by one on how do you install wall paneling, you will get the panels in place and make them stay strong. Try not to use the wrong glue and always get the surface ready before you start. This will make the job easy and the result good. Wall paneling is a smart way to improve a room, bring out style, and make the area feel new. If you want to redo an old room or create something new, this is a good idea. If you have questions about wall paneling or need a bit more help, you can ask to learn how you get the look you want for your home.

Frequently Asked Questions

Can I install wall paneling by myself or should I hire a pro?

For most people who own a home, wall paneling is something you can do yourself. Panel installation is a good idea if you know how to use the basic tools. If the square footage is very large or the design is hard, then getting a pro may give you the best results. Paneling that is done by an expert can also look better when the space is big or the job is not easy.

What is the easiest way to ensure panels are level and aligned?

To get the best results with your wall paneling, grab a level and draw a straight, up-and-down line for your first panel. It is very important to line up this first panel right, because every other panel will be put up following this one. Also, use a tape measure for all of your steps to make sure the work is done well.

Do I need to remove existing wall coverings before installing paneling?

Yes, you need to take off wallpaper or loose paint before starting wall paneling. For a good panel installation, the back of the panel must stick to a surface that is clean and smooth. A surface like primed drywall works best. If the back of the panel does not stick well, it could make the whole job weak and not last.

Add a Comment

Your email address will not be published. Required fields are marked *